Create a SadConsole game: Part 2 - Cursors and parents
This article is the 2nd in the series of Getting Started tutorials for SadConsole. You’ll learn how to use the Cursor object to write on a Console. SadConsole can also display more than one console, and you’ll learn how to show multiple consoles on the screen.
Previous articles in this tutorial:
Prerequisites
Section titled “Prerequisites”To start this part of the tutorial, you need a SadConsole project created by following the previous tutorial in this series. However, you might have been experimenting with your code. To make sure you start this tutorial with the same code, copy and paste the following code into your program.cs:
using SadConsole.Configuration;
Settings.WindowTitle = "My SadConsole Game";
Builder    .GetBuilder()    .SetWindowSizeInCells(90, 30)    .ConfigureFonts(true)    .UseDefaultConsole()    .OnStart(Startup)    .Run();
static void Startup(object? sender, GameHost host){    if (Game.Instance.StartingConsole is null)        throw new NullReferenceException("You should never have this error if you used the UseDefaultConsole startup code.");
    Console startingConsole = Game.Instance.StartingConsole;}
Use the Cursor
Section titled “Use the Cursor”The SadConsole.Console type is the basic type you use to get data on the screen. As you learned in the previous part of this tutorial series, you can use methods like SetGlyph, SetForeground, and even Print, to draw on the console. The console cursor offers another way to write to the console, something you might be more used to.
When you run a terminal program, such as powershell.exe, cmd.exe, or bash, you’re presented with a blinking cursor, letting you know it’s ready for you to type something. When the programs you run communicate back to you, that cursor prints things to the screen:
SadConsole provides a cursor system as way to show users where text is about to be written, where they should use the keyboard to type, or just as a convenient way to draw to a console. You can chain cursor commands into a series of actions:
- Match the printing style of the cursor to the host console.
- Move the cursor to position 20,21.
- Print the text “Rocko is my favorite dog”.
- Change the print color to Green.
- Move the cursor to a new line.
- Print the text “No, Zippy is my favorite dog”.
Replace the Startup code with the following and run your program:
static void Startup(object? sender, GameHost host){    if (Game.Instance.StartingConsole is null)        throw new NullReferenceException("You should never have this error if you used the UseDefaultConsole startup code.");
    Console startingConsole = Game.Instance.StartingConsole;
    startingConsole.Cursor.PrintAppearanceMatchesHost = false;
    startingConsole.Cursor        .SetPrintAppearanceToHost()        .Move(0, 21)        .Print("Rocko is my favorite dog")        .SetPrintAppearance(Color.Green)        .NewLine()        .Print("No, Zippy is my favorite dog");}
The first thing the code does is alter the cursor’s look. By default, the cursor always prints text in the style of the console that hosts it. Once you set Cursor.PrintAppearanceMatchesHost to false, the Cursor.PrintAppearance property controls the printing color. This defaults to a Black background and White foreground.
The code causes the cursor to do things, but you don’t see a cursor on the screen. By default, the cursor is invisible and doesn’t respond to the keyboard. To show the cursor, change the IsVisible property to true.
static void Startup(object? sender, GameHost host){    if (Game.Instance.StartingConsole is null)        throw new NullReferenceException("You should never have this error if you used the UseDefaultConsole startup code.");
    Console startingConsole = Game.Instance.StartingConsole;
    startingConsole.Cursor.PrintAppearanceMatchesHost = false;
    startingConsole.Cursor        .SetPrintAppearanceToHost()        .Move(0, 21)        .Print("Rocko is my favorite dog")        .SetPrintAppearance(Color.Green)        .NewLine()        .Print("No, Zippy is my favorite dog");
    startingConsole.Cursor.IsVisible = true;}
Run your program and you’ll see the cursor blinking. When you type though, nothing happens. The cursor is currently visible, but it’s not enabled yet. To make your cursor respond to keyboard events, two conditions must be satisfied:
-
The console must be focused (you can use
startingConsole.IsFocused = trueto focus the console).
By default, the “starting console” is already focused. -
The cursor must be enabled.
To enable the cursor, set the IsEnabled property to true.
static void Startup(object? sender, GameHost host){    if (Game.Instance.StartingConsole is null)        throw new NullReferenceException("You should never have this error if you used the UseDefaultConsole startup code.");
    Console startingConsole = Game.Instance.StartingConsole;
    startingConsole.Cursor.PrintAppearanceMatchesHost = false;
    startingConsole.Cursor        .SetPrintAppearanceToHost()        .Move(0, 21)        .Print("Rocko is my favorite dog")        .SetPrintAppearance(Color.Green)        .NewLine()        .Print("No, Zippy is my favorite dog");
    startingConsole.Cursor.IsVisible = true;    startingConsole.Cursor.IsEnabled = true;}
Now when you run the game, you’ll see that the cursor is blinking, and when you type on the keyboard, the cursor prints the characters to the screen!
Containers
Section titled “Containers”SadConsole has a framework in place that lets you create more than one console and display them at the same time. SadConsole provides a generic object that allows parenting but doesn’t display anything itself: ScreenObject.
The starting screen is a Console, so you’ll need to get rid of that and start over if you want a base container object. Create a new ScreenObject that hosts a few consoles.
First, you don’t need the starting console because you’ll provide your own object. Remove the .UseDefaultConsole() line from the startup configuration:
using SadConsole.Configuration;
Settings.WindowTitle = "My SadConsole Game";
Builder    .GetBuilder()    .SetWindowSizeInCells(90, 30)    .ConfigureFonts(true)    .OnStart(Startup)    .Run();
static void Startup(object? sender, GameHost host){
}
Now, do the following:
- Create a new
ScreenObjectand assign it to a variable namedcontainer. - To make this object the main object processed by SadConsole, assign it to the
Game.Instance.Screenproperty.
static void Startup(object? sender, GameHost host){ ScreenObject container = new ScreenObject(); Game.Instance.Screen = container;}The previous code you used at the start of this article used the Game.Instance.StartingConsole property, and now you’re using the Game.Instance.Screen property, known as the “current screen.” When SadConsole starts up with the default console turned on, the Game.Instance.Screen property is assigned to the StartingConsole property, so they’re referencing the same object. The current screen is the object that’s processed by SadConsole every game frame. It represents what is on the screen visually.
If you run the game now, nothing displays. A ScreenObject is just a container that lets you add multiple child objects to it, but it doesn’t draw anything itself. Use ScreenObject when you have a container that doesn’t need to draw anything directly. However, Console is a type of ScreenObject, so you can use it as a container that draws something. Add child objects to a Console and it draws them on top of itself.
First child console
Section titled “First child console”The first console you create displays on the top-left part of the screen. It won’t take up the whole screen, and it uses a unique background color so that you can distinguish it from the second console you’ll create soon.
static void Startup(object? sender, GameHost host){ ScreenObject container = new ScreenObject(); Game.Instance.Screen = container;
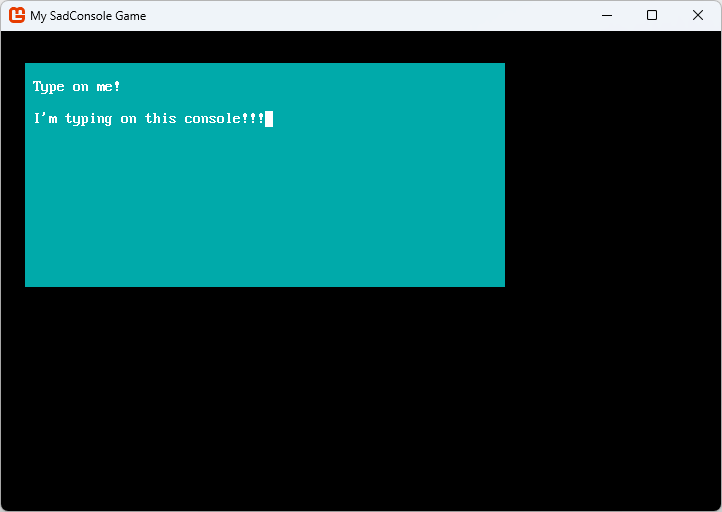
// First console Console console1 = new(60, 14); console1.Position = (3, 2); console1.Surface.DefaultBackground = Color.AnsiCyan; console1.Clear(); console1.Print(1, 1, "Type on me!"); console1.Cursor.Position = (1, 2); console1.Cursor.IsEnabled = true; console1.Cursor.IsVisible = true; console1.Cursor.MouseClickReposition = true; console1.IsFocused = true;
container.Children.Add(console1);}The code above introduces a few new concepts you might be unfamiliar with:
-
console1.Position = (3, 2);containeris the root object, which doesn’t draw anything because it’s aScreenObject.console1draws something on the screen because it’s a console.console1is a child ofcontainer, added by the last line of the code:container.Children.Add(console1).Children are positioned relative to their parent. In this case,
console1is positioned at (x3,y2) relative to its parent,container, which is at (x0,y0), the default position of an object. The final drawing position ofconsole1is calculated using the formulaself.Position + parent.Position.containeris the root object and is positioned at (x0,y0), the top-left of the game window, soconsole1is drawn at (x3, y2) on the window.Positions are calculated differently between objects that have a surface versus those that are containers. A later article explains this difference.
-
console1.Surface.DefaultBackgroundandconsole1.ClearEach console (which is made up of a surface) has a
DefaultBackgroundandDefaultForegroundproperty. The background property is the most important of the two. This controls the default “fill” color used on cells. SadConsole has some optimization built into it based on this property. Always set theDefaultBackgroundproperty to a color that matches your most used background color of a console. Any cell whose background matches theDefaultBackgroundis optimized by skipping its own background drawing.The
console1.Clearmethod is called to reset every cell to the new default background color. In our case, this makes sure every cell is colored with a Cyan background. -
console1.Cursor.MouseClickReposition = trueThis allows the mouse input to move the cursor for you. When you click on the console, the cursor will reposition itself to wherever the mouse was clicked.
-
console1.IsFocused = truePreviously, the starting console was automatically focused. Only the focused object receives keyboard input. If the
containerwas focused,console1still wouldn’t receive keyboard input, even though it’s a child object. This is a common mistake developers make with SadConsole, they forget to Focus the console or object to receive keyboard input.
When you run the code, you’ll see a screen like the following, try typing with the keyboard and clicking the mouse:
Add a child to the first console
Section titled “Add a child to the first console”When children are added to a parent, they draw on top of those parents. Currently, the object hierarchy of Game.Instance.Screen consists of two objects.
- container - console1Add another object to the hierarchy. Instead of a Console though, add a ScreenSurface. A ScreenSurface is like a Console, with only one minor difference: the console has a built-in Cursor, while ScreenSurface doesn’t. (You can add a cursor to a ScreenSurface if you want.)
This surface is a child of the console. It draws on top of the console, but you won’t allow it to gain focus or process any input. Add this code after the previous code.
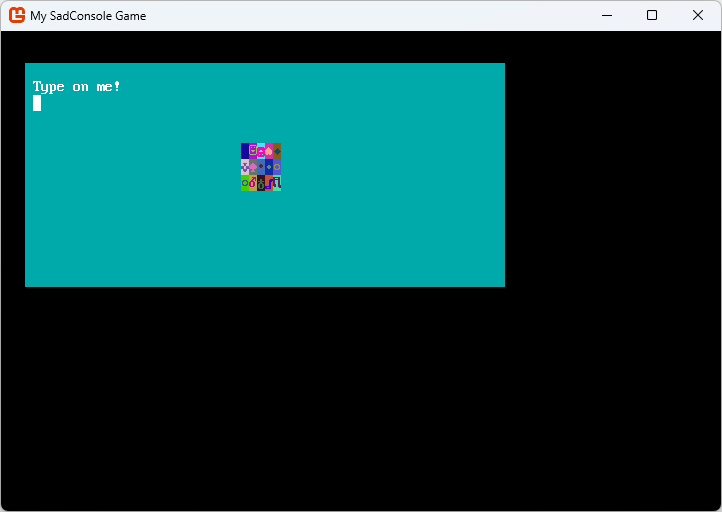
// Add a child surfaceScreenSurface surfaceObject = new(5, 3);surfaceObject.Surface.FillWithRandomGarbage(surfaceObject.Font);surfaceObject.Position = console1.Surface.Area.Center - (surfaceObject.Surface.Area.Size / 2);surfaceObject.UseMouse = false;
console1.Children.Add(surfaceObject);
Run the program and you can see the other surface displayed on top of the console. Try moving the cursor and typing behind surfaceObject.
Now the object hierarchy of Game.Instance.Screen is:
- container - console1 - surfaceObjectSecond child console
Section titled “Second child console”The final thing you’ll do is add a second console. This console is a duplicate of the first, but with a different background color. This example demonstrates changing focus between objects.
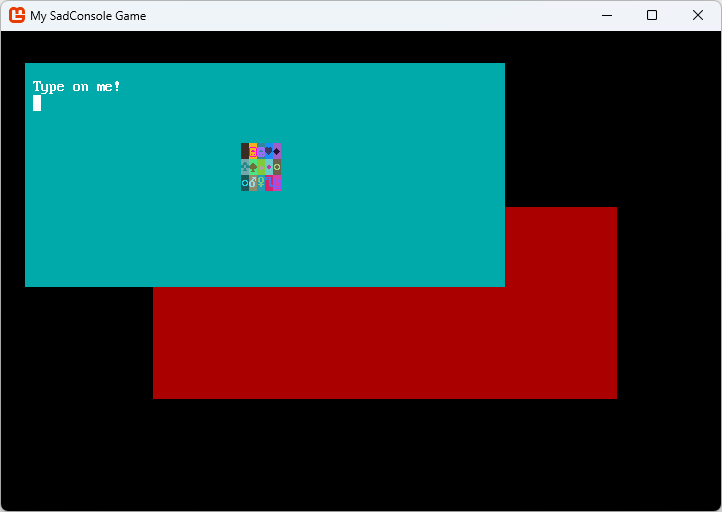
// Second consoleConsole console2 = new Console(58, 12);console2.Position = new Point(19, 11);console2.Surface.DefaultBackground = Color.AnsiRed;console2.Clear();console2.Print(1, 1, "Type on me!");console2.Cursor.Position = new Point(1, 2);console2.Cursor.IsEnabled = true;console2.Cursor.IsVisible = true;console2.FocusOnMouseClick = true;console2.MoveToFrontOnMouseClick = true;
container.Children.Add(console2);container.Children.MoveToBottom(console2);
Two new properties and a new method appear here:
-
console2.FocusOnMouseClick = true;Remember, only the focused object receives keyboard input. If you want the second console to receive that keyboard input, you need to remove focus from the first console and give it to the second. Normally you do this with
target.IsFocused = true. You don’t need to set the previous target tofalse; SadConsole automatically removes focus from the previous object when you set focus on a new object.SadConsole can detect when the mouse is clicked on a surface and automatically give it focus, which is what the
FocusOnMouseClickproperty does. Set that property onconsole1also. You’ll be able to click back and forth between both consoles and type on them. -
console2.MoveToFrontOnMouseClick = true;The draw order of objects is based on where they are in their parent’s
Childrencollection. TheMoveToFrontOnMouseClickproperty responds to the mouse click and moves the object so that it’s on top of its sibling objects, positioning it last in the collection. Whichever object is added last becomes the top-most drawn object. Whichever object is first in the collection is the back-most drawn object. Changing an object’s focus doesn’t affect drawing order. -
container.Children.MoveToBottom(console2);Because you added
console2to thecontainerafterconsole1,console2is the top-most object drawn, being the last in the collection. However, you want the experience to be thatconsole1is the first console you interact with. Two ways accomplish this. First, the code above solved this problem by forcibly movingconsole2to the bottom of the collection. The second way is to add the consoles in the order you want them to appear, with the last item added being the top-most. For example, remove the existingcontainer.Children.Addmethod calls for both consoles, and add this to the end of the code routine:container.Children.Add(console2);container.Children.Add(console1);Now the consoles are inserted in the order you want them displayed, with
console1on top.
Now the object hierarchy of Game.Instance.Screen is:
- container - console2 <-- first in the collection, drawn first, below others - console1 <-- last in the collection, drawn last, on top of console2 - surfaceObject <-- as a child of console1, drawn on top of itRun the program and you can see and interact with both consoles.
When interacting with the game, try clicking on the different consoles. You’ll notice a few problems:
- When you click on
console2(Red) it’s moved to the front and when you type,console2receives the input. - If you click on
console1(Cyan) after clickingconsole2(Red), the following happens:console1stays in the background.- If you type,
console2still responds to the keyboard, even though you clicked onconsole1.
- When you click on
console2(Red), the cursor isn’t moved to the position of the mouse like it is withconsole1.
These behavior differences come from a few properties set differently between console1 and console2. Can you fix those bugs? Try and see if you can!
Conclusion
Section titled “Conclusion”Now you have both a working console and a non-console surface. You’ve explored how SadConsole uses the Cursor object to let you type, emulating a terminal. You also learned how to parent one object to another and move items within the parent’s Children collection. The next part of this series explores keyboard and mouse input.